 Hywel Llewellyn
Free Office 365 Email Service for Multiple Domains - Part 1 Configure DNS in CloudFlare Host
Free Email for Additional Domains in Office 365
For small business, adding user licences to Office 365 can get costly. If you already have a domain that is licensed for Office 365 services, then there is an option to configure additional domains for email using the shared mailbox feature. The email for these extra domains do not require new user licences and so are Free.
There are two parts, Configuring DNS for the Additional Domain, which is described in this post… and Configuring the Office 365 Shared Mailbox for Additional Domains, which will be covered in an upcoming post.
See other Office 365 tips in my previous articles:
- Convert Office 365 User Email to Shared Mailbox and Remove the User License
- How to Configure Mac Mail Client for Sending and Receiving Email from Office 365 Shared Mailbox
- Microsoft Office 365 Catch-all using Additional Alias Email Addresses
Step 1 Identify Required Office 365 DNS for Email
Using this link; Create DNS records for Office 365, DNS records that are needed for email using Office 365 were identified.
These are:
- An MX record so email for your domain will come to Office 365
- An Autodiscover CNAME record for the email (Exchange)
- An SPF TXT record for your domain to help prevent email spam
Step 2: Add Domain to Office 365
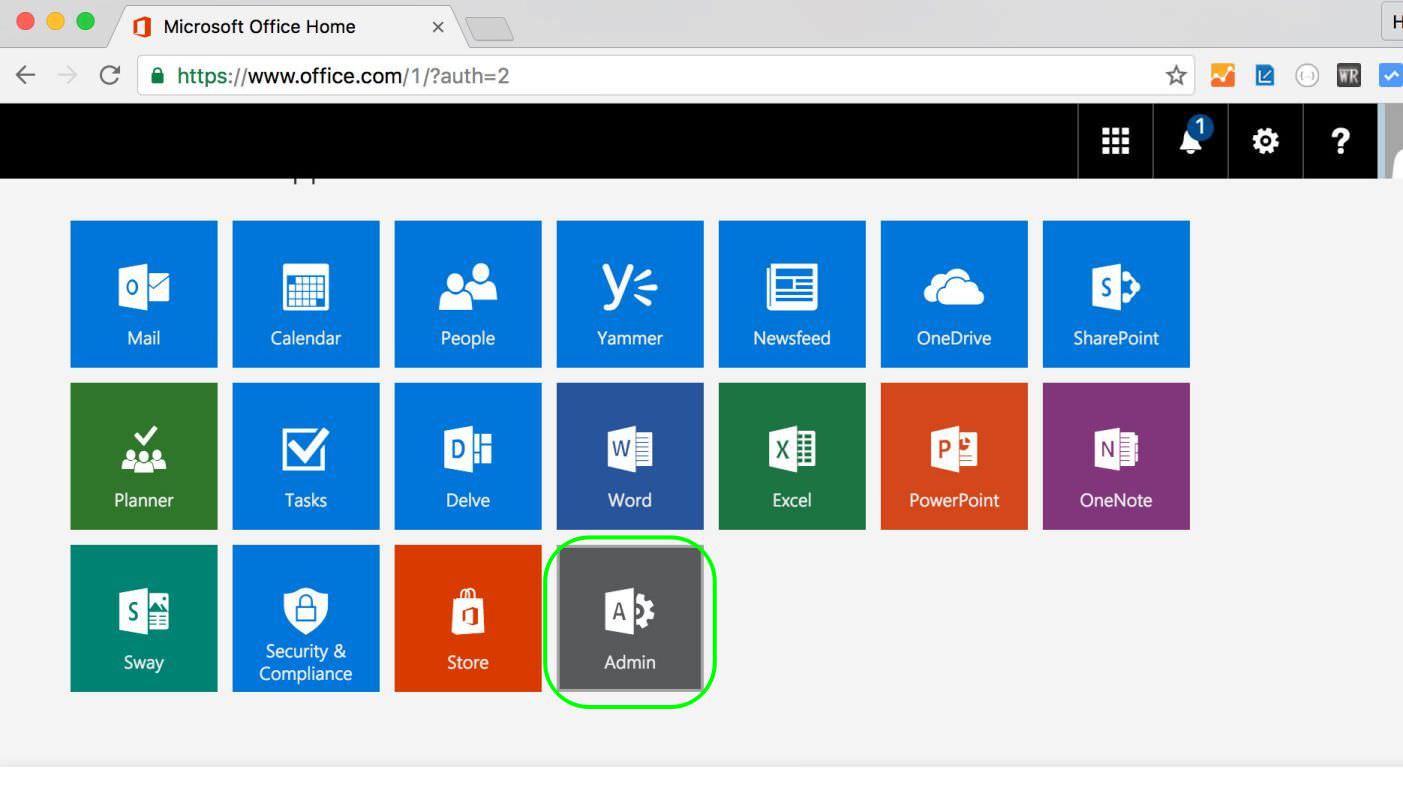
2.1 Login to Office 365 and select Admin
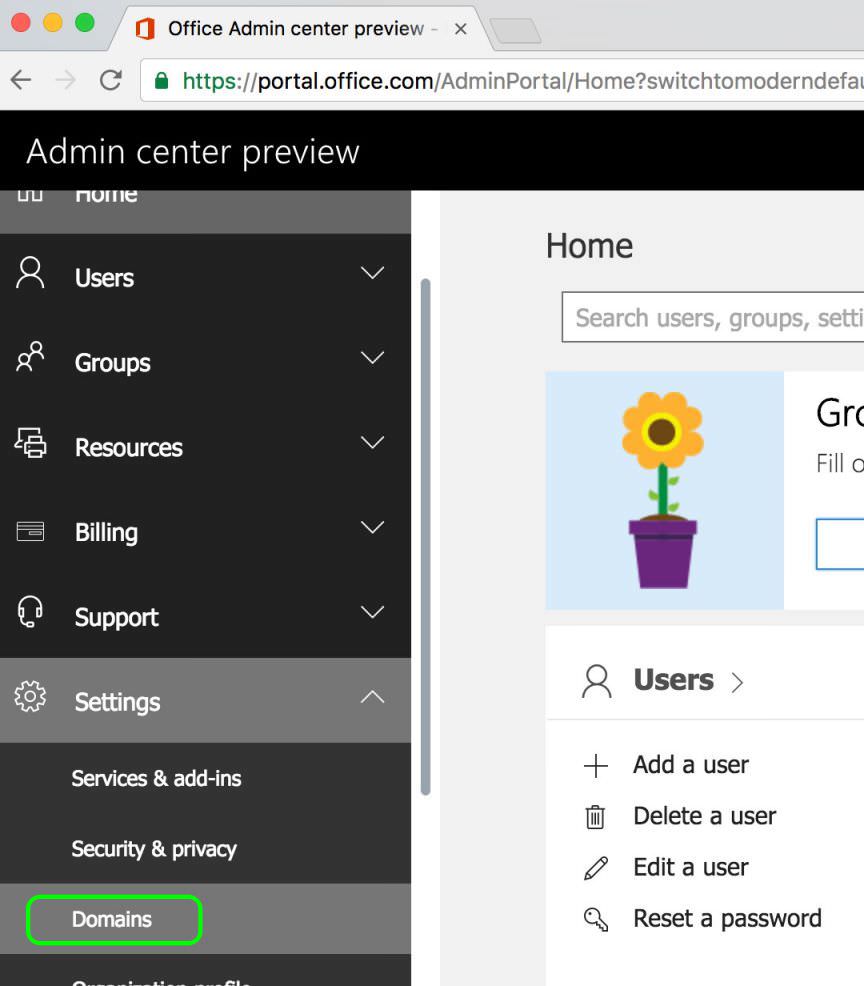
2.2 Under Settings click Domains
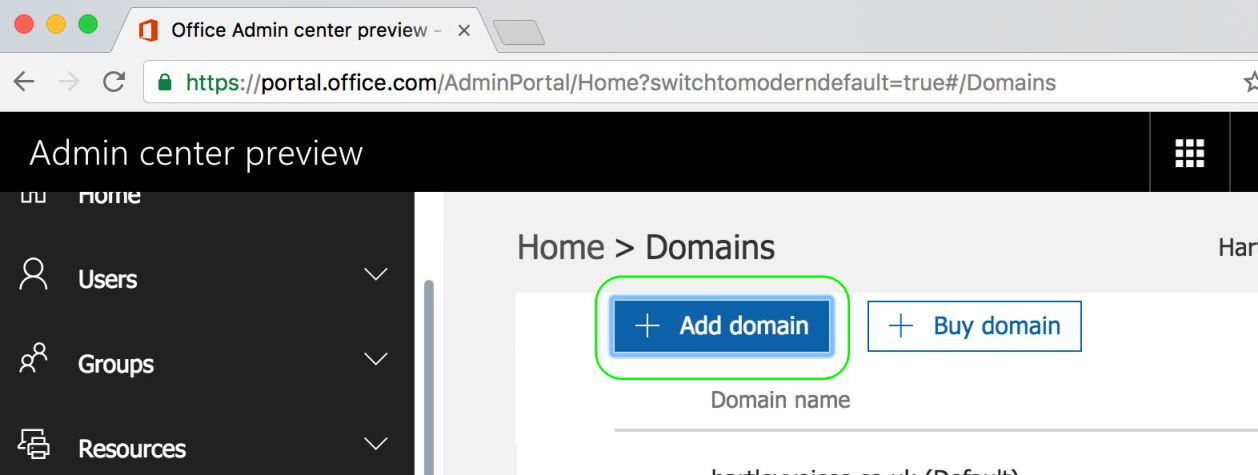
2.3 Click + Add Domain
2.4 Type your new additional domain and click Next

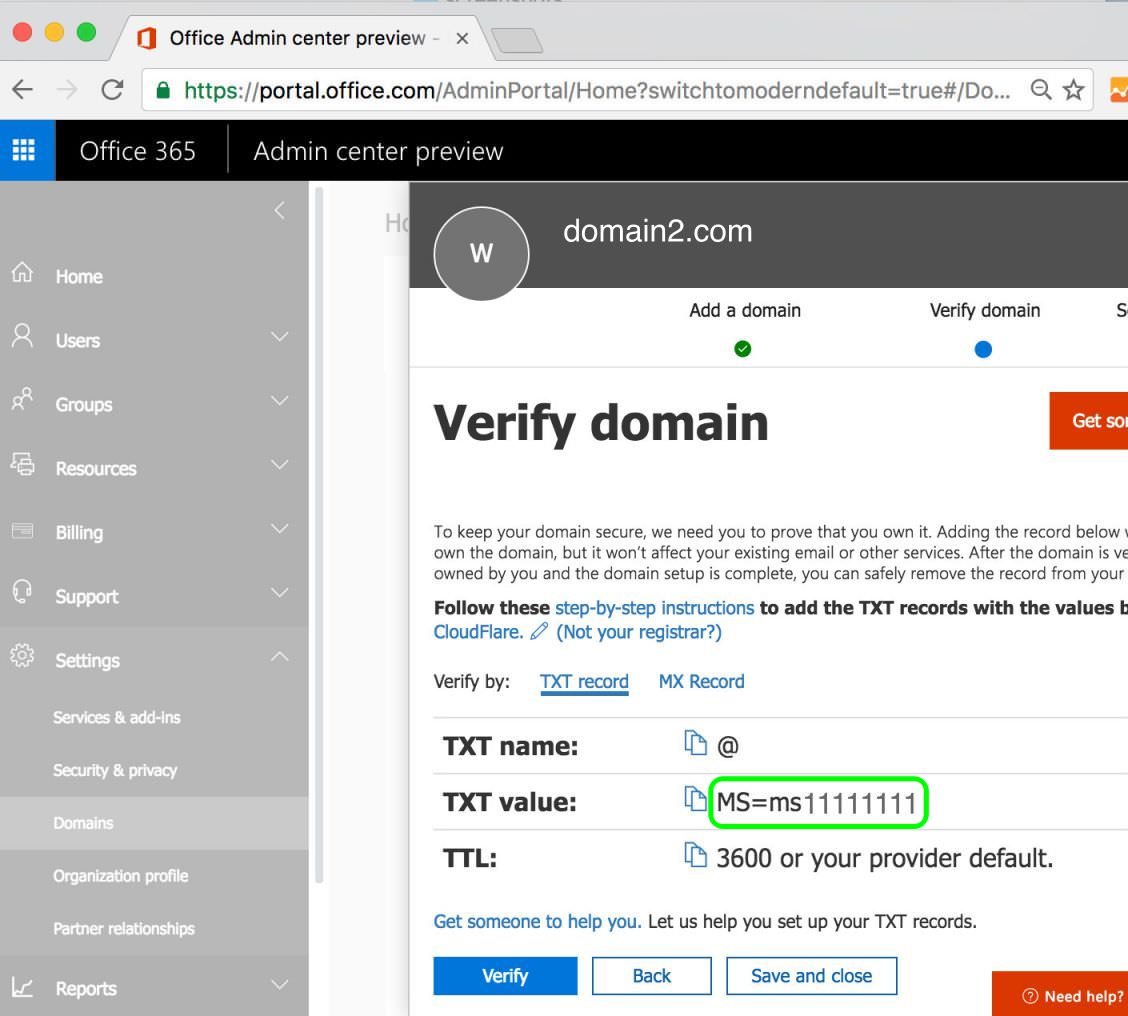
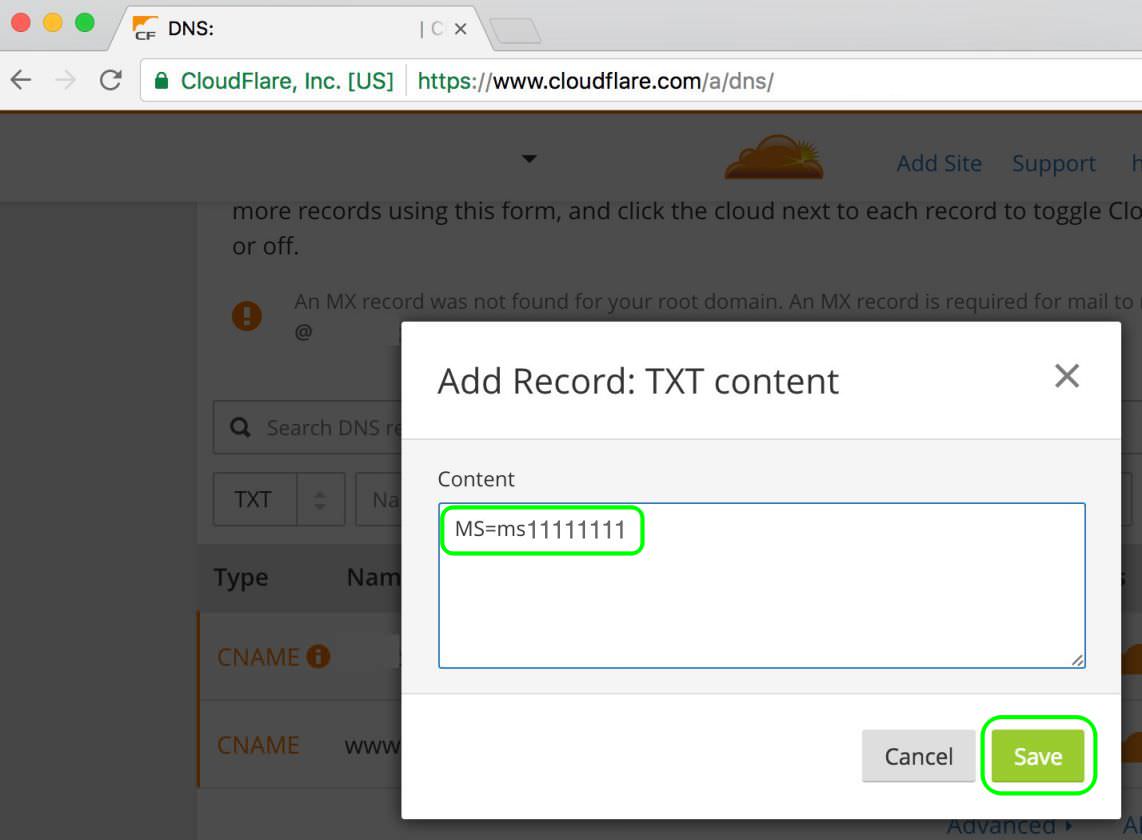
2.5 Copy the TXT value shown under the Verify domain screen
Step 3: Verify Domain for Office 365 - CloudFlare DNS is used in this example
Open a new browser window, go to your domain within your DNS host. You will be adding a TXT record with the verify value provided by Office 365.
3.1 Select TXT
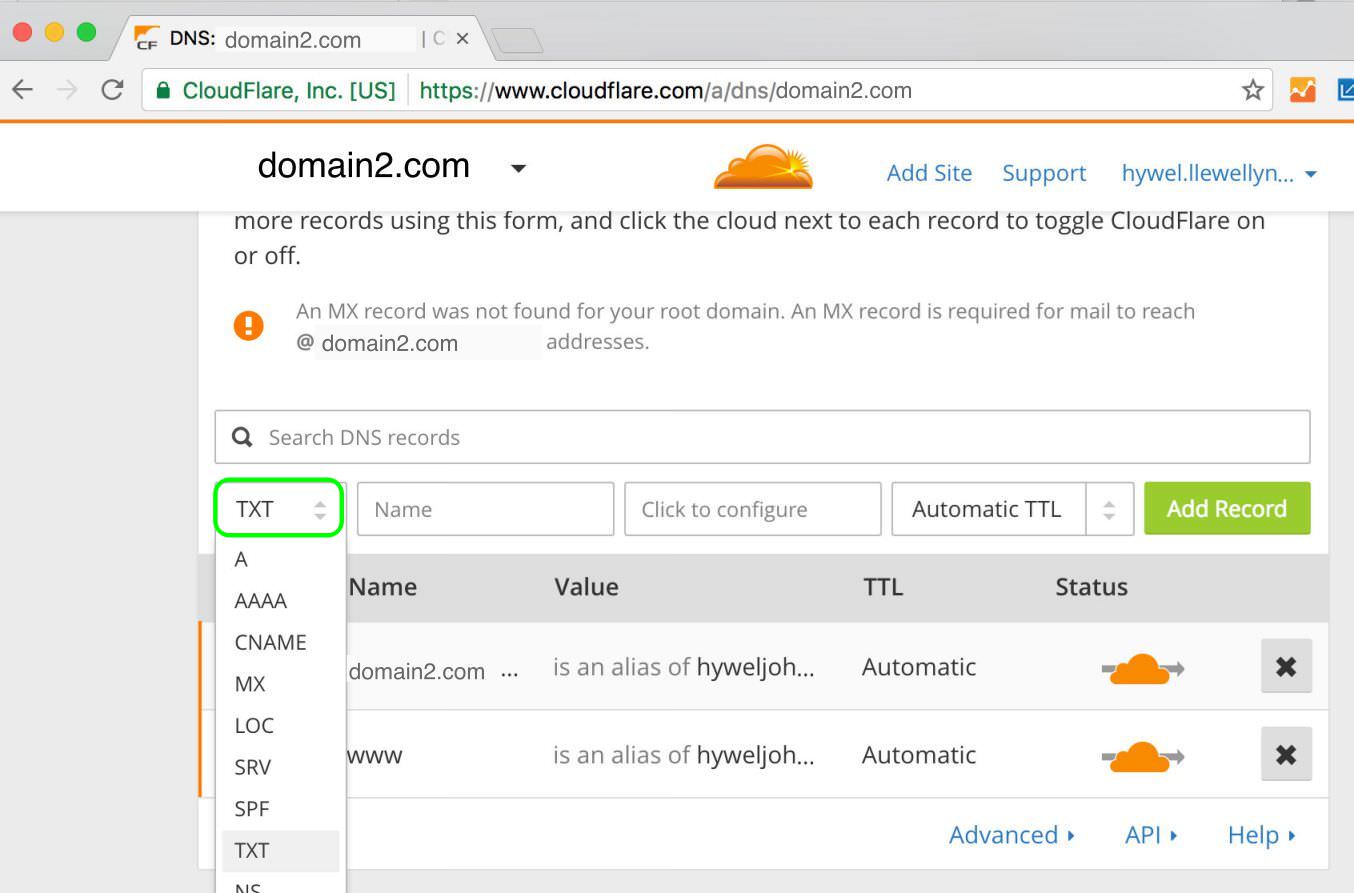
3.2 Paste the Office 365 TXT value - from Step 2.5 to TXT Content and Save
3.3 Click Add Record
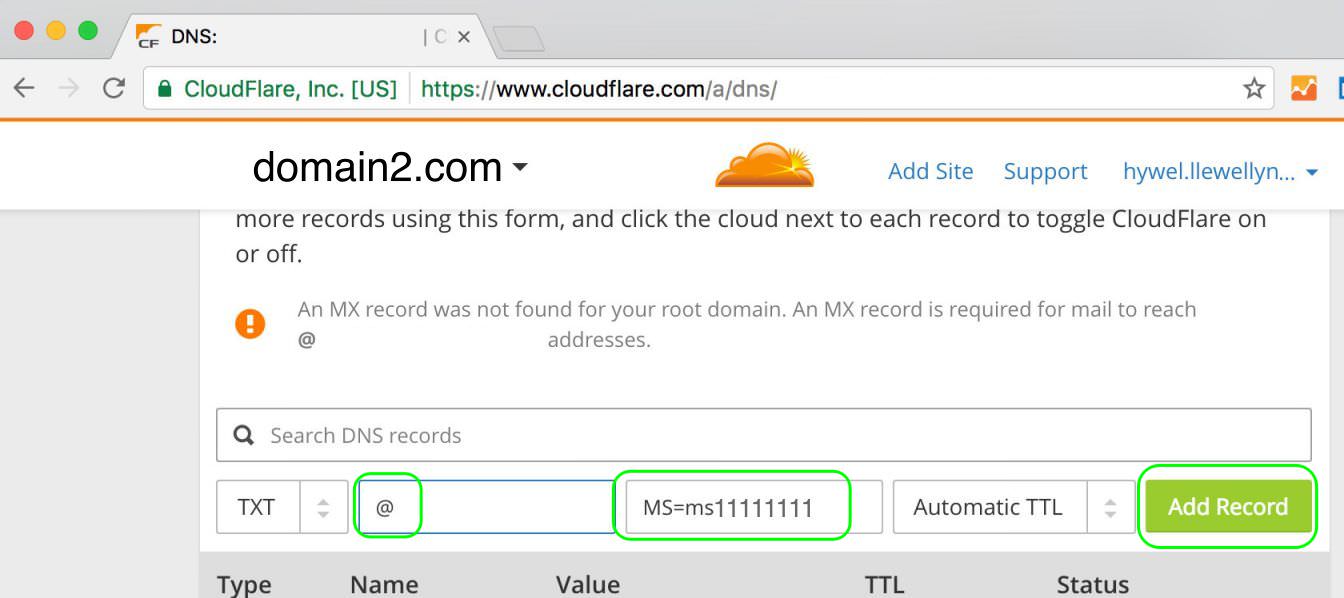
Note there are some detailed step by step instructions provided to Create DNS records at CloudFlare for Office 365, which may help.
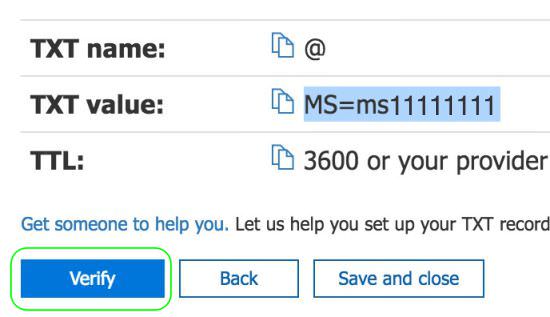
3.4 Back in the Office 365 browser window, Click Verify
Step 4: Add MX Record To Direct Email for your Domain to Office 365
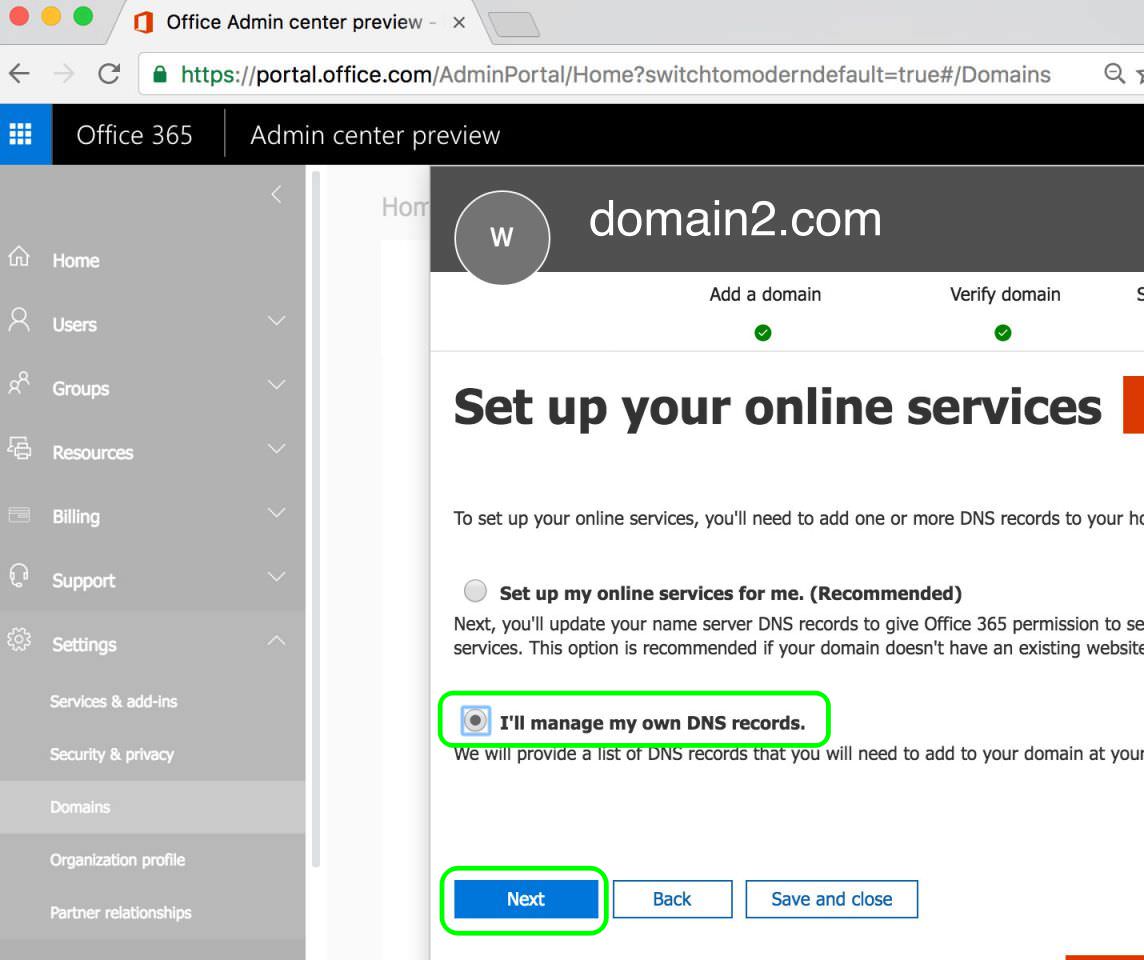
4.1 Select I’ll my own DNS records and click Next
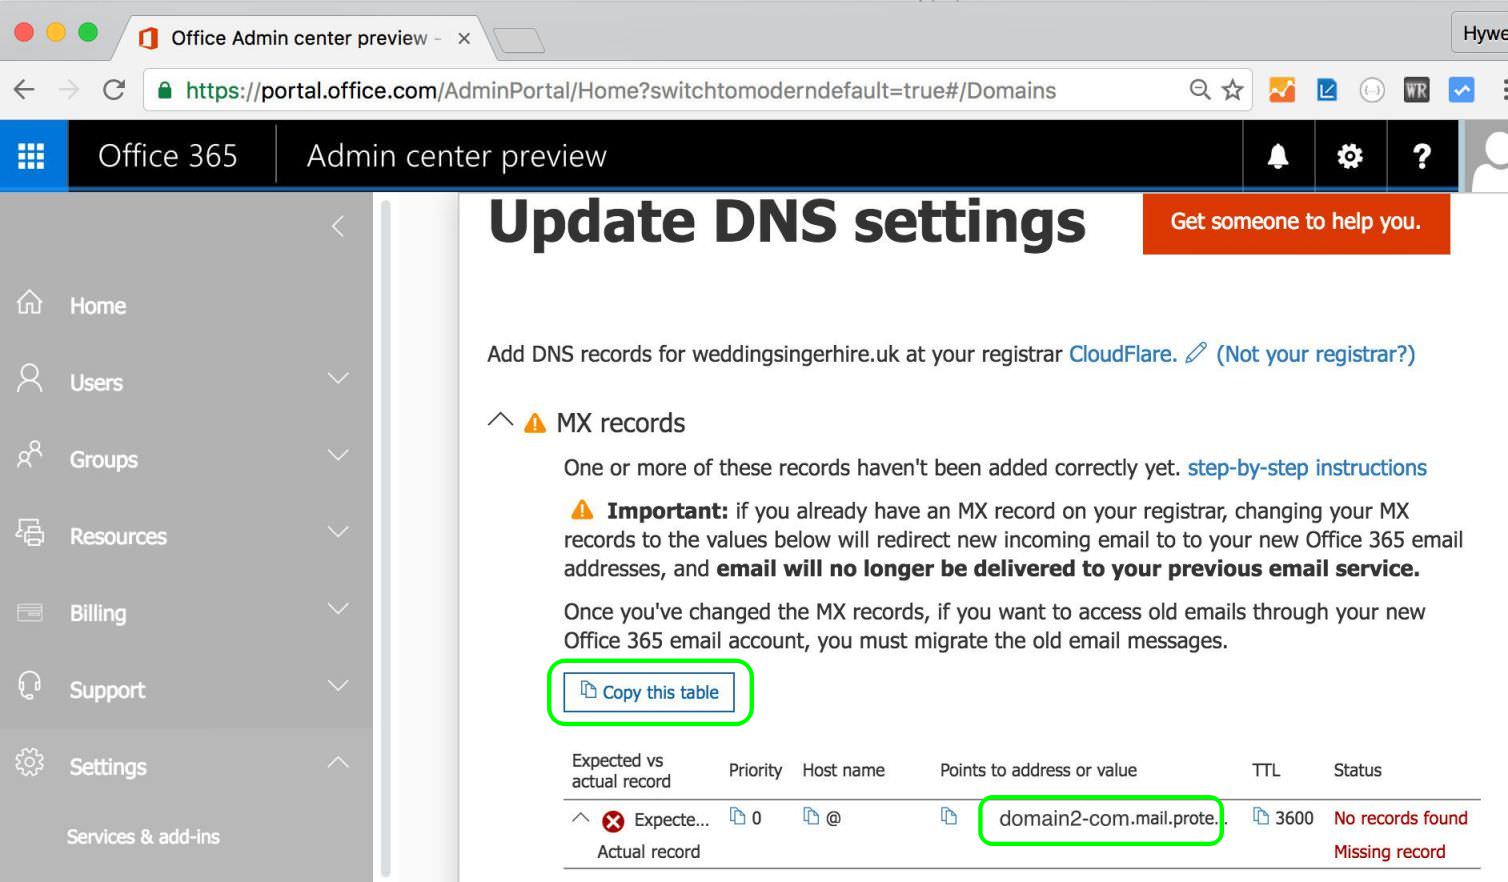
4.2 Copy the mail protection text to clipboard
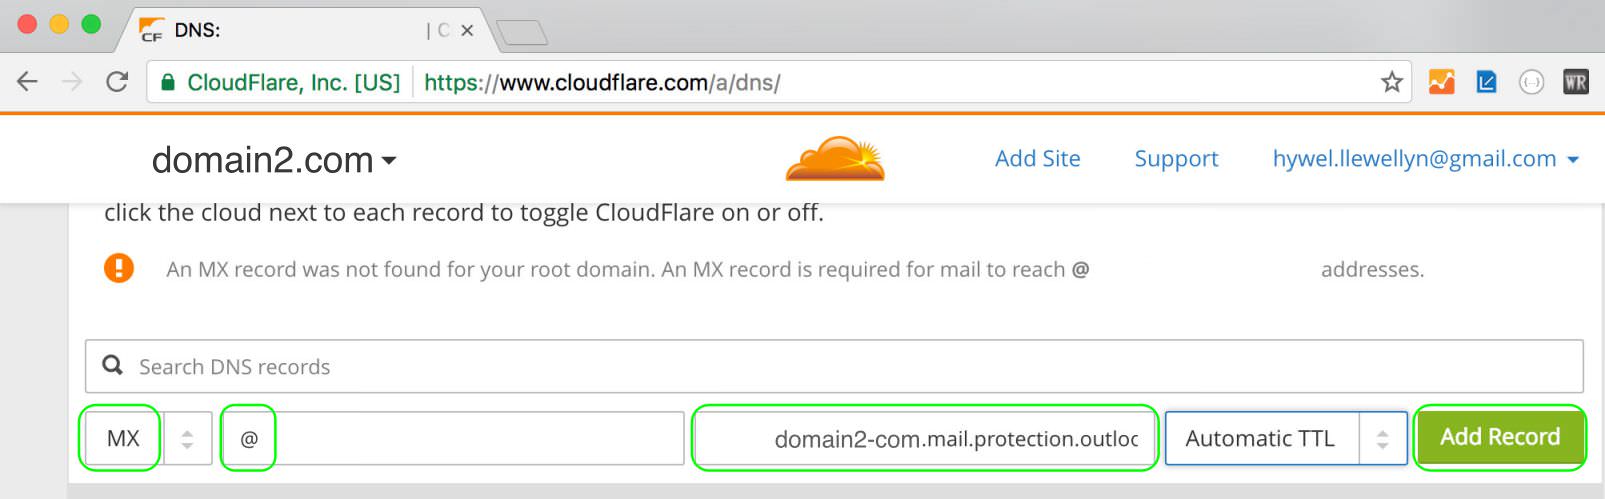
4.3 In a separate browser for your DNS Host select a new MX Record and paste the text, in this case CloudFlare
4.4 Click Add Record to add the MX record
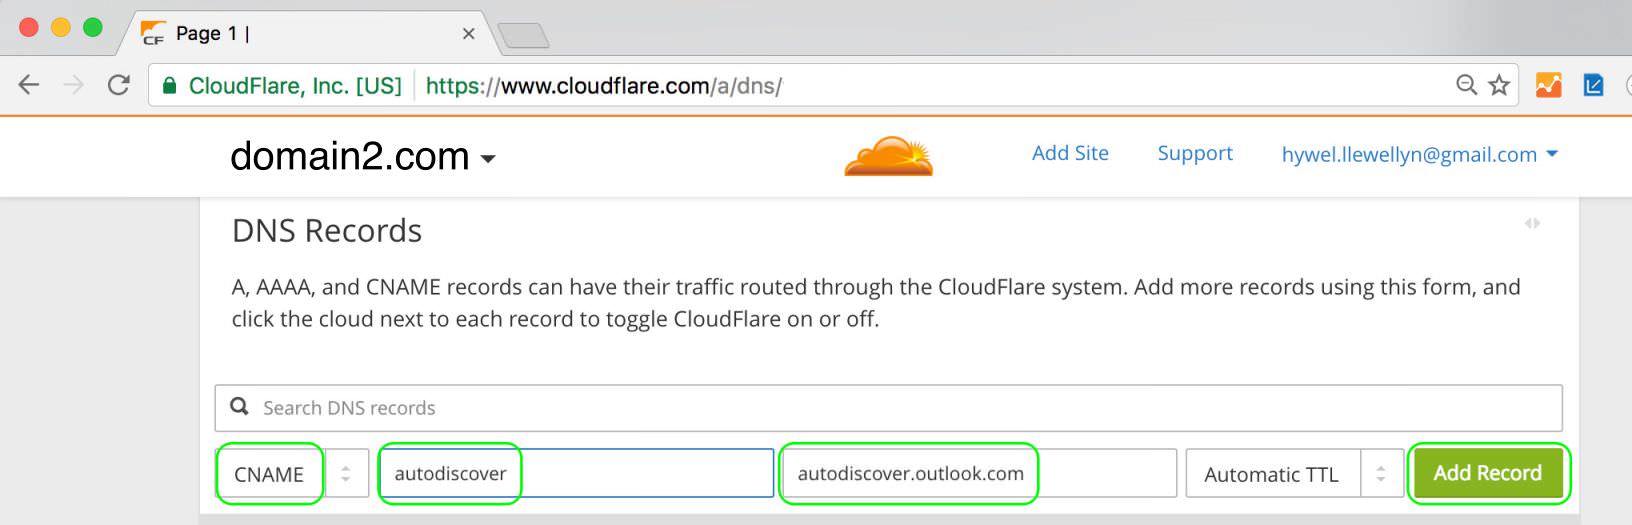
Step 5: Add Autodiscover CNAME record for the email (Exchange)
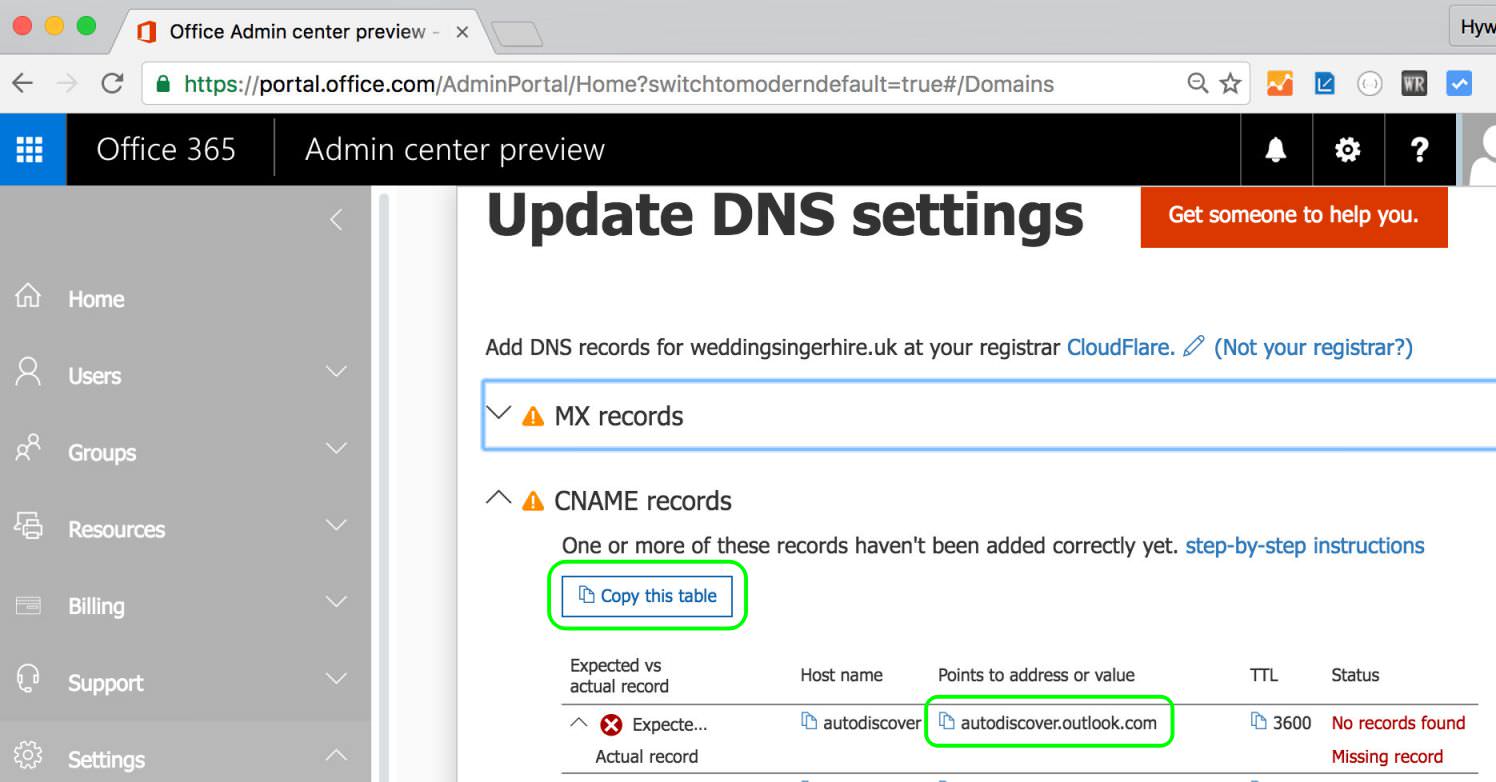
5.1 From the the Office 365 browser, copy the autodiscover.outlook.com to clipboard
5.2 In the CloudFlare browser window add a CNAME record for autodiscover as shown, remember to click Add Record
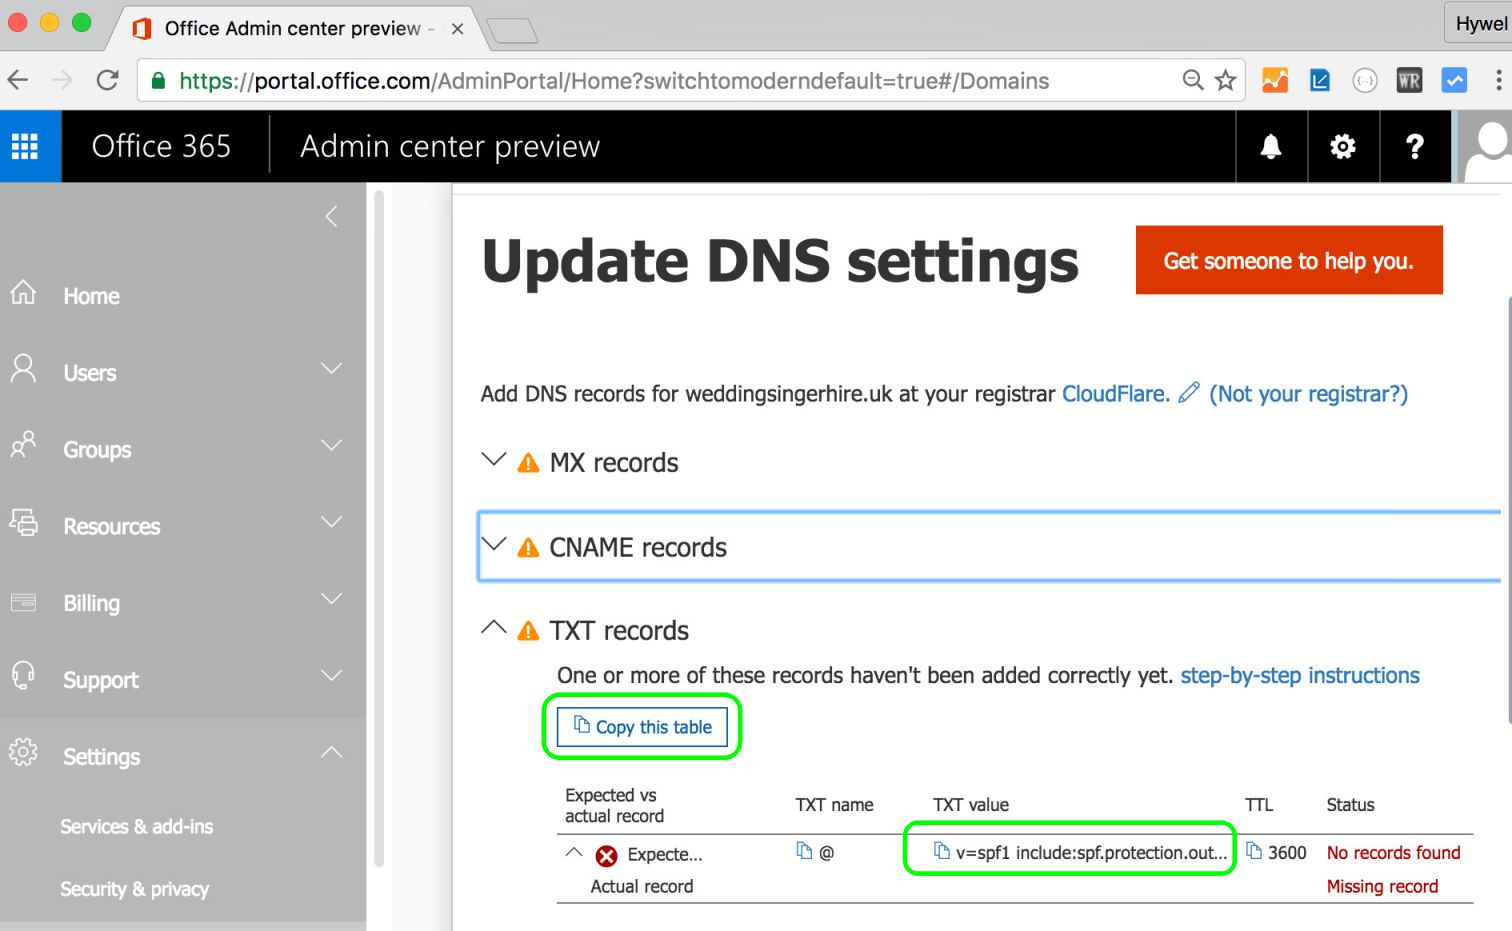
Step 6: Add SPF TXT record in DNS Host for your domain to help prevent email spam
6.1 From the the Office 365 browser, copy the TXT value for SPF to clipboard
6.2 In the CloudFlare browser window add a TXT, pasting the SPF text from step 6.1
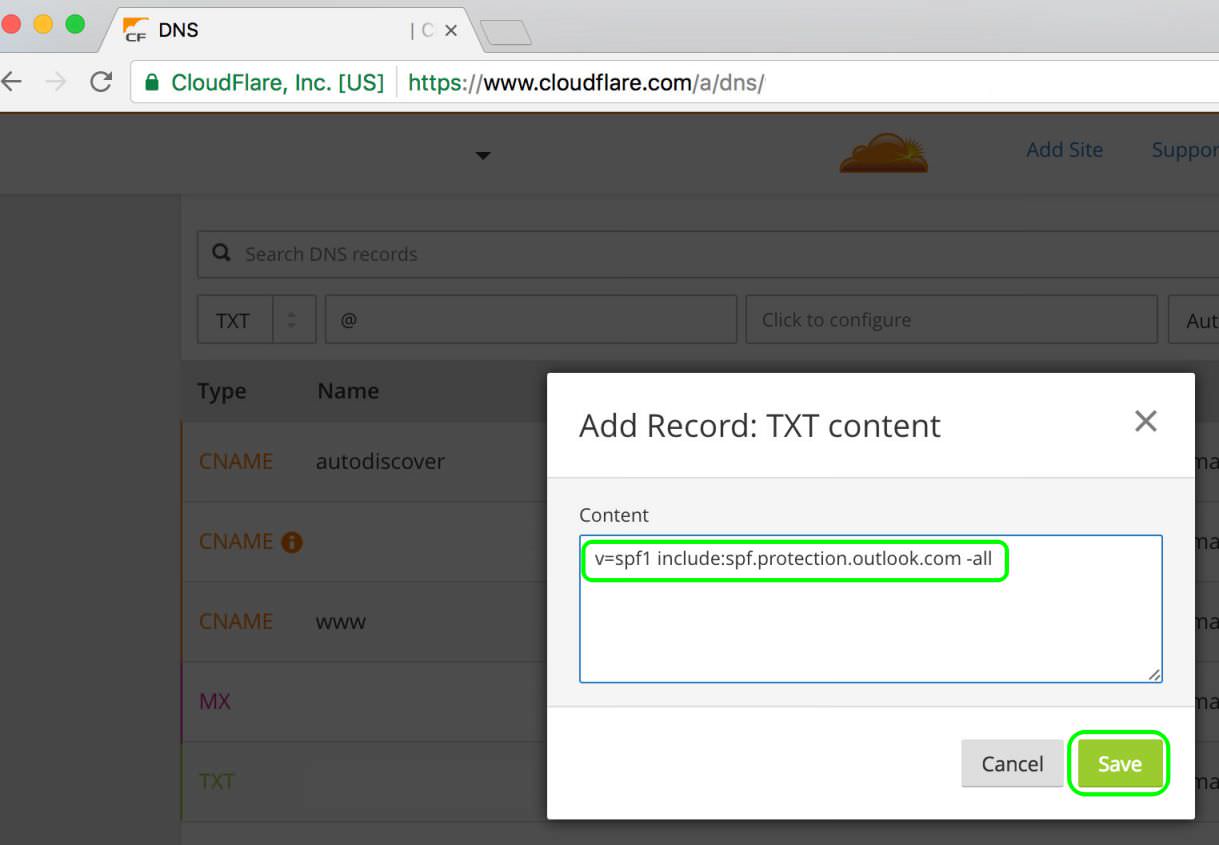
6.3 Click Add Record
Step 7: Verify the new Domain DNS Settings in Office 365 and Finish
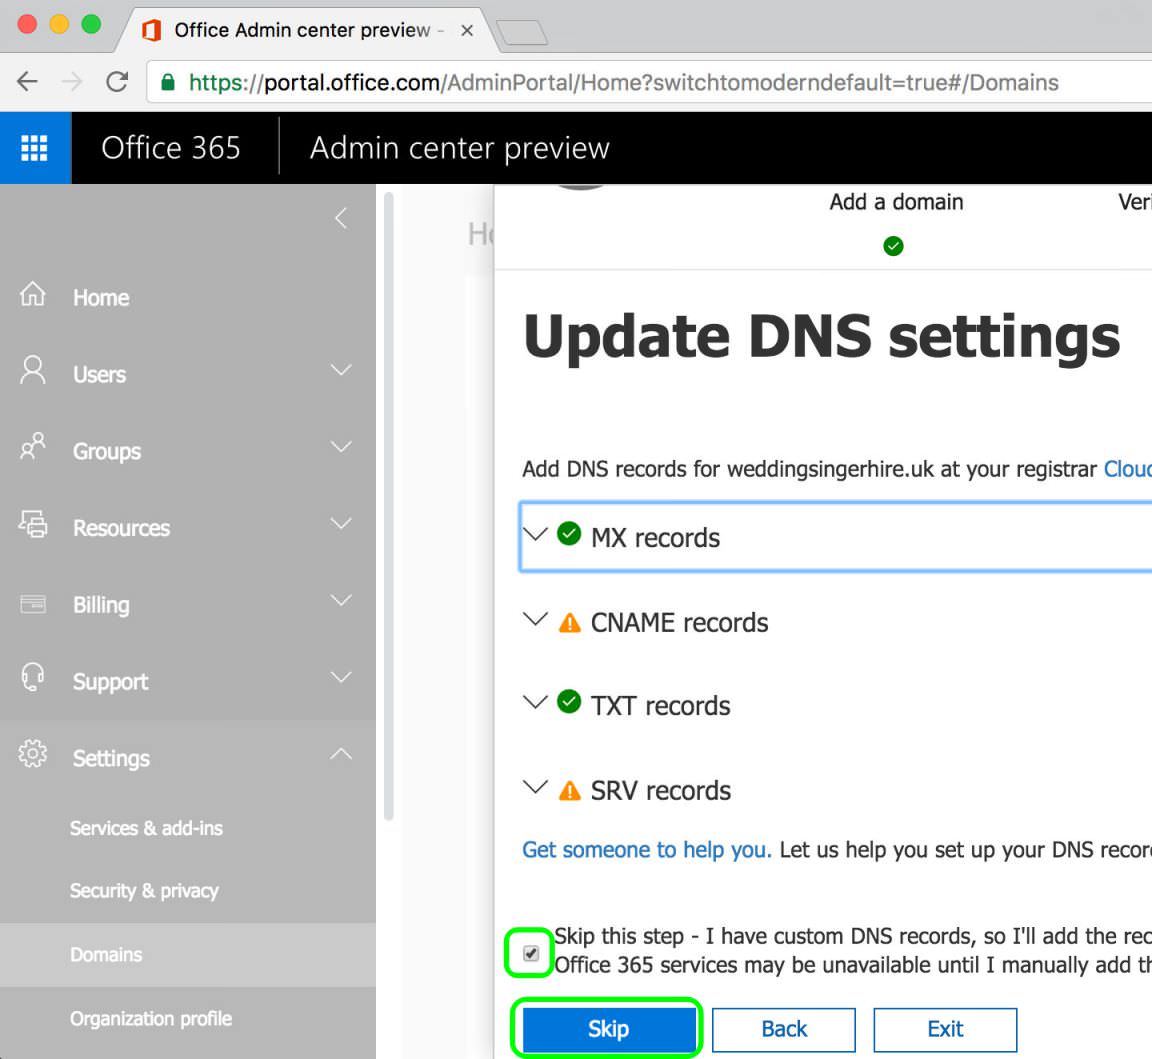
7.1 In the Office 365 Browser - Update DNS Settings window, click Verify
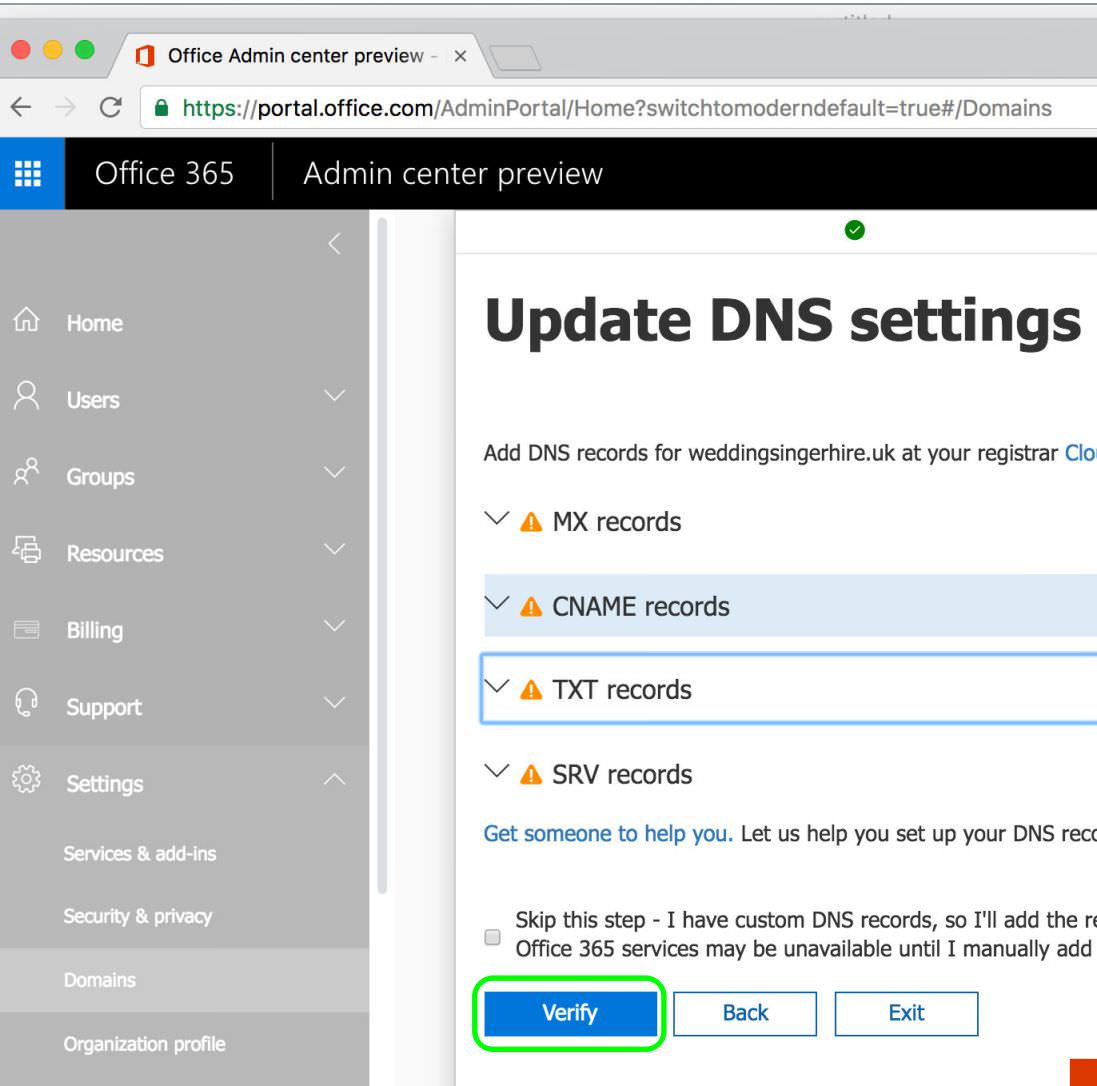
7.2 You may see some warning triangles against CNAME and SRV, that’s because we only configured DNS for email, not all Office 365 services. Just click Skip
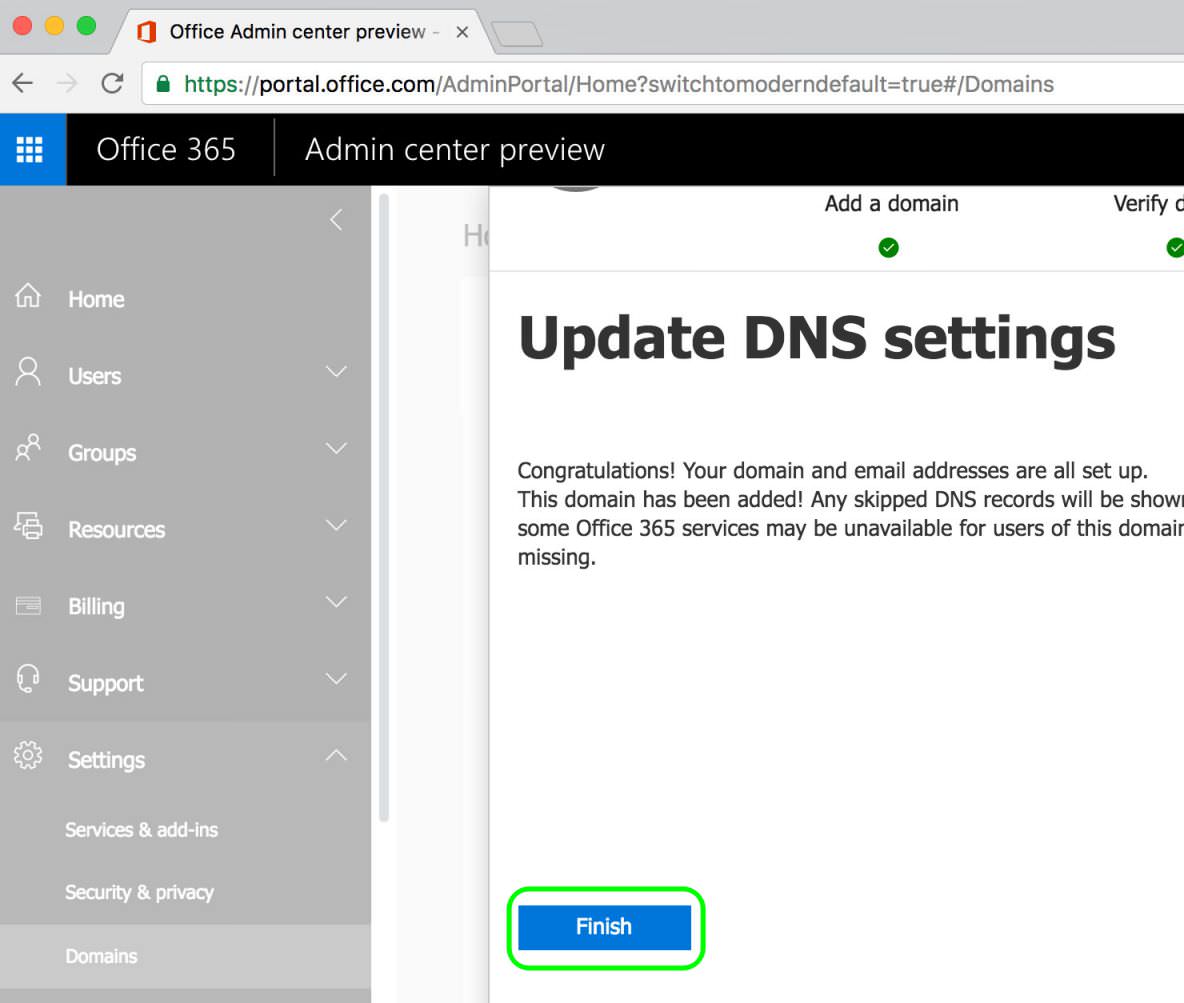
7.3 Click Finish
Summary
We have added the new domain2.com to Office 365 and configured the required DNS records for email in the CloudFlare DNS Host. In Part 2) I will describe how to configure Office 365 to use this additional domain for email.